Memories are funny things though and it is amazing how quickly you forget your cabin fever and look back on a winter with rose colored glasses. Yes, there was snow but that meant sledding, snowmen, snow forts and winter wonderland walks in the woods. This year we have had maybe 2 inches of snow tops. It has been a cold but dry winter and when it does warm up we get rain instead of snow and often ice rain. It sucks. I never thought I would wish for snow, but with four kids desperate to use new sleds from Santa and me wanting to improve my snow fort building from last year a good dumping of snow is being wished for here at the Blue Barn.
So here we are reading snow books, making small world snow scenes to play with and doing everything short of pumping fake snow into our yard.
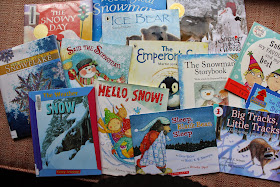
It's no surprise then that when I dug out my books today to link to a craft I was choosing from a shelf selection that looked like this:
D and I settled on these two books,
The first book we read was The Snowy Day, a children's classic and perfect for the younger child. This book won the Caldecott Medal in 1963 and as Bubba always tells us "That means its good for kids"- and it is. A beautiful story taking you on a journey with a little boy as he experiences a city draped in snow. The simple illustrations make it an easy journey for children to follow along without even needing the story.
The second book is definitely geared more towards a slightly older child. Taking the reader on a journey of discovery and teaching the young reader exactly where snowflakes come from, how they form and why they are different. It is written in a very simple to follow way and accompanied by lots of beautiful photographs of individual snowflakes that give an amazing perspective on just how different snowflakes can be. D is just four and was able to follow along well, retained a few facts to share later in the day and loved examining all the different snowflakes.
Growing Crystal Snowflakes
This really is such a simple project to do, especially if you already have Borax at home (which we do because of all the slime we like to make). The crystal snowflakes are so pretty hanging in the window and it is a great mini-science experiment for the kids to try. It only requires a few minutes to put together and then you need to leave it overnight to see the effects.
You will need:
Borax
Pipe Cleaners
A glass
Wooden skewer / Pencil
Step 1
To begin I helped D create a snowflake shape out of 2 pipe cleaners and tied the top to a wooden skewer. Make sure that you don't create it too big, it needs to be able to fit inside your glass without touching the sides.
Step 2
Next D measured out 4 tablespoons of Borax and put it into the glass.
I added boiling water and he stirred the liquid until all the Borax had dissolved.
Step 3
Lower the snowflake (or any other shape you made) into the glass and have the skewer resting across the top. The pipe cleaner should not be touching any of the sides.
Leave it to sit out the way, you don't want to move it as the crystals are forming. It takes about 8 hours, we left ours over night.
Step 4
Observe.
D liked to keep checking on his snowflake to see what was happening.
After an hour or so we could already see crystals forming on the edge of the glass and on our snowflakes.
By the next morning the crystals had formed and we were able to lift out the snowflake to have a good look it.
They were so pretty,
And when you looked closely you could see the individual crystals that had clung to the pipe cleaner and which really resembled the snowflake pictures in the book.
Maybe these snowflakes hanging in our window will encourage the real snow the kids desperately want to fall.


after you use the solution-once you are done letting your ornament form-can you reuse the solution for another
ReplyDelete