So we have a Yeti fan in the house, I think it started when he was about 2 and we took him to see the Frozen movie in the Theatre because of his big sisters being obsessed and while watching there is that scene with the ice castle and the Abominable Snowman, his big brother was hiding under the seat in the movie theatre terrified and my then two year old was laughing his head off! Ever since its been Yeti PJs, T-shirts, books and games - have you played Yeti Spaghetti (one of his favorites).
Anyway when Trixi over at www.ColoredButtons.com asked me to participate once again in her Christmas Sew a Softie (which is an amazing event jam packed with lots of super easy and fun beginner sewing projects for kids) I knew I had to say Yeti! So if you have a Yeti obsessed kid, or maybe just fancy making your own Abominable Snowman for Rudolph then read on, I've included all the info on how to create once of these cute furry guys below.
You Will Need:
White Fur
White Felt
Blue FeltWhit
Grey Felt
Googly Eyes
White Embroidery thread
Scissors
Needle / glue
Step 1
Print out the Yeti PDF
Step 2
Cut out the templates and begin by tracing the body shape onto the fur and the white felt.
Then cut the fabric so you have two body pieces.
Cut the other smaller template parts out and trace them onto the blue and grey felt.
Step 3
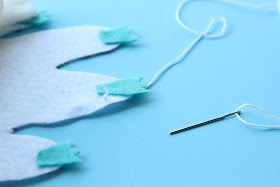
To make it easy for the kids I hot glued the hands and feet onto the white felt sheet, you could sew them on but for beginner sewers this way is easier. I used my hot glue gun so they could get on and sew straight away.
Step 4
To begin sewing take a long piece of the white embroidery thread. Tie a big knot in one end and then thread it through the bottom later of the body so that you hide the knot on the inside.
Take the furry body part and line it up on top of the felt piece.
Begin to sew the two body pieces together by stitching around the outside. I like to show the kids blanket stitch as it holds it together nicely when you go to stuff it but a running stitch will work too.
Step 5
Once you get almost all the way around (leave at least an inch gap) you can add the stuffing. Using your fingers make sure that the filler goes down the arms and legs of the Yeti.
Once you are happy with the amount of stuffing finishing sewing around the outside to seal it up.
Step 6
Once sealed around the edges add the extras to the front of the yeti. Cut out the last two remaining shapes his face and his tummy. We hot glued these to the outside of the yeti.
Add the googly eyes.
And draw on a mouth with a black sharpie.
Now he's ready to play...
ITS YETI TIME!!!
And if you are looking for more sewing projects after you've made your Yeti why not check out our Gingerbread Cookie Cutter softies from last year.


So super cute!
ReplyDeleteThank you
DeleteGreat blog you havve here
ReplyDelete