With just over a week until Christmas the number of cardboard boxes arriving each day has multiplied at this address ten fold. I love the ease of internet shopping, and lets face it if it weren't for Amazon my kids would not be getting any presents this year, because really when on earth did my Mum ever have time to do Christmas shopping? - or anything else for that matter! The downside of my easy life is of course all that cardboard, I hate seeing so much waste, tiny gifts in too big boxes and although we do recycle the cardboard I do like to use what I can with the kids to create. After all its a free art supply and I can never have enough 'free' in my life.
There are so many wonderful ways to re use cardboard, just this past month we have turned this:
Into trees, more trees, gingerbread houses and so much more.
Today I thought I'd share a sweet little Reindeer invitation I left out for the kids to create.
To create a Reindeer you will need:
Lots of cardboard boxes
Our Reindeer template found here
Any art supplies you have on hand, a few ideas are:
- Paints
- Pastels
- Scrap paper such as wrapping paper or old art work is great
- Stickers
- Washi Tape
- Chalk pens
- Fabric
Step 1
Print out the template and cut out the shapes. Use the template to trace the reindeer face and nose. For the antlers you will have to print the page twice and tape together to create a full template or flip the template over to create the left and right side of the antlers. Once you've cut the cardboard you should have three shapes that would stack together as shown below.
Step 2
Decorate.
I love leaving out invitations for the kids to create their way. Having the base template gives them a great starting point to go in which ever direction they choose. I had left out a number of easy supplies to get them started but I also let them know that it was 'open studio' so they were welcome to raid the supply shelves too if they had an idea that needed something else.
Here are a few of the 'easy' supplies that we love as part of this invitation to create. None of this is sponsored by anyone -I wish! We just really like these things for creating with and they all worked especially well on many of the cardboard creations we have made. All these items would be great additions to anyones craft supplies.
Washi tape, tears easily even little fingers can use this and its just oh so pretty. As you can see from the picture we have a little obsession with it, these are just our christmas ones 😳.
Next up were our pastels, so many possibilities and kids love how they glide onto the paper, plus they are super fun to blend together for your own unique look.
Scraps of paper, this pile of off cuts was from another project but really with paper anything goes, old artwork is awesome or Holiday wrapping paper, the skys the limit.
The kids especially liked the bucket of bits. I'd filled it with bells, stars, stickers and pompoms. For our christmas trees this was one of the most popular additions but surprisingly for the Reindeer they stuck to the other stuff more.
My son was recently gifted these kwik sticks for his birthday and immediately fell in love with them as did all the other kids so I soon had to buy more. They look like twistable crayons but glide easily onto the paper/cardboard and are in fact paint, except they dry really quickly. they worked great on these reindeer.
The final supply we wanted to give a shout out to was our fab fav Fun Chalk. We pretty much use these on everything. The colors are super bright and the kids love them. (I do too!)
Back to the decorating. The only guidelines I gave the children was that I wanted them to use a different material for each layer of their Reindeer. For example if they used paint on the antlers they were not allowed to use it on another template piece. This helps to get the kids from using just their favorite medium and also helped to create the fun look with the final Reindeer. Its also tricker than they thought to match up the different colors and textures to create the desired look they were after.
I did offer them other supplies but the majority stuck to what was in front of them on the table.
Step 3
Once all three pieces are decorated you can glue them together, we used the hot glue gun for this because it held them better immediately but regular glue would also be fine if you have the time to lay them flat to dry.
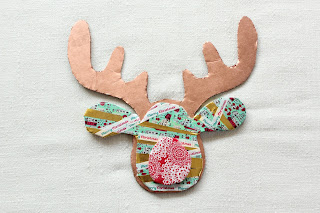
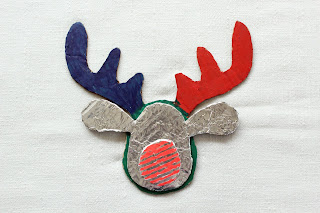
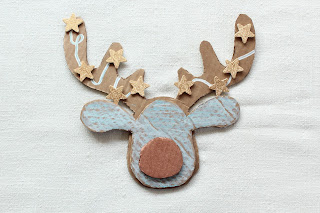
Here are a few of the creations, I love how different they all are and to think they started life as packaging!
If you have a go at making them I'd love to see pictures, tag us on Instagram @thebluebarn or leave a picture here in the comments.
Happy Holidays


No comments:
Post a Comment