Wednesday, November 29, 2017

Christmas Countdown

Isn't it nice when someone does all the hard work and then hands you all the benefits on a plate? Well, your welcome!! Ha ha or should it be Ho Ho? In all seriousness this idea came to me and I thought, "Wow this would be a great help to someone" so I decided to upload it here so you can all use it too.

This Christmas countdown can have you looking like the best Mom in the world and you don't even have to worry about not planning anything until now because all you have to do to start is click HERE and you will be redirected to a FREE PDF to download and print to have your own. This countdown gives you a festive activity a day to try with your child and if you need a little help with each activity just scroll down further and you will see tips and links to help you carry out each task. For some days you may need to gather some basic supplies but hopefully most can be found at your local grocery store. And if you don't fancy using them as a countdown maybe just use them as a post chock full of awesome suggestions for things to do with your kiddos this holiday season.


Once you have printed out the paper simply cut the squares out and hang them somewhere for your children to see each day. A couple of examples might be to - hang them on a string on the wall, tie them to your Christmas tree or tuck them inside envelopes and create a mailbox to post them in when they've been completed. 

So here we go:


This one is easy, get your kids to help you decorate your Christmas Tree. Already decorated your tree? No problem, why not cut a triangle shape out of some paper and have them color their own tree and decorate it with stickers, markers, glitter - whatever you like.


Red paper, pens and a few junk mail toy magazines have always been my kids favorite way of creating a list for Santa. Little ones enjoy sticking pictures down before they know how to write.


Colored paper, scissors, glitter, glue leave lots of supplies out for a simple invitation to make cards for all the family.


Ok so mom might need to help a little, search for your favorite slime recipe, we like to use Elmers Glue, water and liquid starch, we add a little color and sparkle. 


For a great how to make no cook playdoh recipe read ours here to adapt it here are the quantities:

1 cup flour plus maybe 1/4 cup more for kneading out
1/2 cup salt
1 cup boiled water
1 tbl oil
2 tbl Cream of tartar
A few drops of peppermint oil
Red food coloring if you need it

Once you've made the dough get creative with it. Maybe dye half red and leave the other half white. Bring out the cookie cutters and other fun accessories to play with it.


Visit your local book store or library and pick out some new Christmas books. Snuggle down and get reading!


I found my Paperwhites on Amazon but I know in the US anyway Home Depot keeps them too. These are such a fun flower to grow this season with the kids, they grow fast and are so easy to plant and I LOVE the look and smell of them. Last year I dedicated a whole blog post to the Paperwhite!


Kindness is contagious I'll let you think of a kind act to suit your family.


Grab your favorite Christmas Movie, pop some popcorn and snuggle down to get yourselves into the holiday spirit!


We love to create a real workshop for Santas Elves to play in this time of year, our Fort Magic kit is perfect for this. (But don't go out and spend money on one unless of course its to go under your tree as a gift - because hey really are brilliant.) Use bedsheets, cardboard boxes, the lounge furniture - most important bring lots of imagination!


Ok so this activity is seriously one of my kids favorite EVER. You can find all you need in your kitchen cupboards or grocery store and CLICK HERE to see details of how to make it.


Ok so you have a few directions here, go buy crazy silly christmas socks to have them wear. Decorate your own silly Christmas Stocking. Or maybe even find some old socks, turn them into sock puppets and tell your own Sock Christmas Story!


Yummy yes please. 
Make sure you get the kids to do the making, its hard to stand back sometimes but they learn much better by doing it themselves.


Woods, park, beach, wherever you are get outside and enjoy a big cup of hot chocolate with whipped cream and marshmallows!! And if you are baking in 80 degree weather why not put chocolate ice cream in the mug instead and pretend its the best hot chocolate you ever tasted!


Do you do Elf on the Shelf? If yes then why not grab some scraps of paper or material and try making  it some clothes or accessories? Ours has had a scarf knitted, a bag and a jacket in previous years, we leave them out beside the Elf and the next day he's often wearing them! No elf? No problem why not try making elf hats for a doll or stuffed toy.


Probably my kids favorite.  Have you watched the movie Elf? Well it appears that Elves LOVE sugar and candy and all things grown ups usually say no too 😆! Elf breakfast for dinner involves waffles, ice-cream, maple syrup and lots of add ons. Go to town its once a year.


The birds will love you for this one and so might a few Raccoons, CLICK HERE to see how you make a Gingerbird house - they won't want any moe sugar after yesterday.


Think warm bath, a little peppermint oil, lots of bubbles, Red Glow sticks. Now turn the lights off and listen to the giggles.


Pick up a cheap felt stocking from the Dollar Store or make your own by cutting it from felt or old fabric. Leave the stocking out with lots of glue and bits and bobs for the kids to have a blast decorating their own stocking.


Cover a large table in a couple of rolls of paper, bring out the cookie cutters and some festive paint, now let your little ones create their own paper.


Coffee filters and Scissors is all you need to create some big beautiful snowflakes to hang in the windows, fold the coffee filters 3 or 4 times across and then have your little one cut around the edges. Opening up the snowflake is always magical and young and old kids will enjoy seeing their snow flake open for the first time.


These smell SO good I'd like them in my house all year. Pick up a big bag of oranges and some cloves when you are next in the grocery store then check this page out for a 'How To'


Oh you know your kids will be bouncing of the walls by now so why not strap them in their car seats and head out searching for the neighborhoods best Christmas Lights. No car? Even better an evening walk around the hood is bound to burn off some steam.


Hopefully  the shoppings done, the presents wrapped and its time to sit down and enjoy yourself. We love to open some new PJs, drink milk, eat cookies and read the Night Before Christmas before dumping our kids into bed extra early so we can pour another glass of vino. You know they'll be up at 3am yelling that Santas been.

MERRY CHRISTMAS

Tuesday, November 28, 2017

Festive Wall Hanging

With the Holidays just around the corner its time to get our Holiday groove on, and I for one am super excited. Between now and Christmas I have lots of surprises up my sleeve so stay tuned! I am kicking it all off today with these ab-fab recycled wall hangings.  This kid friendly wall hanging is super easy for an elementary aged kid to pull together solo or even your preschooler with a little parent guidance. And I guarantee it will look beautiful hanging on anyones wall. 


You will need:

An old pair of jeans or denim fabric
White acrylic paint
An old credit card or gift card
White yarn
Metallic embroidery thread
A wooden dowel
Glue


Step 1

Pour your paint onto a plate or flat surface. Taking your credit card dip the long edge into the paint and then drag it lengthways down the center of your material. This is going to be the tree trunk, you might want to repeat this step a couple of times to create a definite line.


Once you have painted the trunk flip your card around and using the short edge dip it into your paint. Now dab it down the trunk at a slight angle to create the branches of the tree. Pressing it down creates a line, if you drag it slightly on the fabric you'll create what I call the 'snow laden' look. Repeat this down both sides of the tree trunk.


Once done leave the paint to dry.


Step 2

Once the paint is dry you can begin to add embellishments to your tree. Depending on the age of your child you can decorate in different ways. I encouraged my older daughter to use this metallic embroidery thread I found at our local craft store. If you don't have metallic a soft grey or sparkly yarn would also work.


We began by stitching a star onto the top of the tree. We also stitched along some of the branches to make them sparkle in the light and added a few snowflakes by knotting the yarn in spots in the background.

If you have a younger child an alternative would be too let them glue sequins or glitter on for the star and snowflakes.


Step 3

If you use glue to add the sparkle wait for it to dry first. Then flip your material over and taking your wooden dowel glue it along the top edge of the fabric. I used my hot glue gun for this bit but elders would work just as well you would just have to pin it in place as it dries.


Step 4

The final part is to add the white yarn to the picture. Using school glue make lines under the tree 'as snow' then cutting strands of yarn stick them to the glue.  


Finally, make two mini tassels. I did this by wrapping yarn around my fingers a few times and then tying a loop at one end I cut the other end. My daughter then threaded this loop onto the dowel and we tightened it by pushing up the tied knot. 


Now all thats left is to go hang it up somewhere and look forward to lots more holiday fun! Please stop by frequently in December to see what we are up to. Its going to be a lot of fun.


Tuesday, October 10, 2017

Kids Can Sew

This past summer my girls participated as sewing ambassadors in the International Sew a Softie event. The tea towel softies from my previous post were their contribution. Teaching kids to sew is such a great skill to learn and can be a lot of fun for them as they manage to complete projects by themselves. I thought it would be fun to share some of the other great simple sewing projects for kids I came across this summer through the sew a softie event.

I've rounded them up and listed them below just to make it super easy for you. No need to spend hours searching pinterest, just check out all these great projects below.


A round up of easy sewing projects for children

  • Loved everything about this idea from Mama Smiles, the creativity behind using a child's own drawings to the basic sewing as they create a 3d version of their sketch. Stuffed toys based on drawings 
  • This Sew a Star Softie by is the perfect project for little fingers and my kiddos love the book how to catch a star by Oliver Jeffers, this would be a great companion project. thanks for sharing Apple Green Cottage
  • These Monsters in a Jar by Coloured Buttons are probably the cutest way to get kids sewing, and my kids went crazy for the little monsters.
  • Forget the kids I want to make one of these Dashounds myself from MakeFilmPlay
  • Got a kid nutty for dinosaurs? Why not check out this Dinosaur Softie and help your little one sew their very own. Great idea Our Daily Craft
  • Mini Matisse show you how to created the prettiest owls I have ever seen here
  • And how about these Pocket Pals by My Poppet I just don't know which one I'd want to make first.
  • Got a tween in the house? My ten year old went crazy over these Emoji Pillows by Easy Sewing for Beginners
  • The Embroiderist has shared a very cool hippo for kids to sew
  • Or perhaps your child would prefer to try their hand at sewing a little bunny rabbit? Check out this 'how to' by Lulu and Celeste 


If your looking for more sewing ideas for children why not check out our Holiday 2016 Christmas round up of simple ideas. 


Alternatively our Tyvek Monsters and our Felt Butterflies were great first sewing projects for the kids. 


Saturday, July 15, 2017

Tea Towel Softie's


Do you ever sew with your kids? I started sewing simple projects with my girls when they were younger and it kind of got them hooked. The excitement that comes from realizing that they can actually MAKE something all by themselves is priceless. We had completed a few basic sewing projects mainly involving items for their American girl dolls prior to last year when I accepted a request to participated in the 'Sew a Softie' Event organized by the talented Trixi from www.ColouredButtons.com. If you are yet to discover Trixi she is a sewing teacher in Australia who has lots of amazingly simple sewing projects for kids great for the most beginner sewer. The girls LOVED everything about making their own softies, you can find their butterfly softies  from last summer here or search for the Christmas Softies and Valentines things they made. 

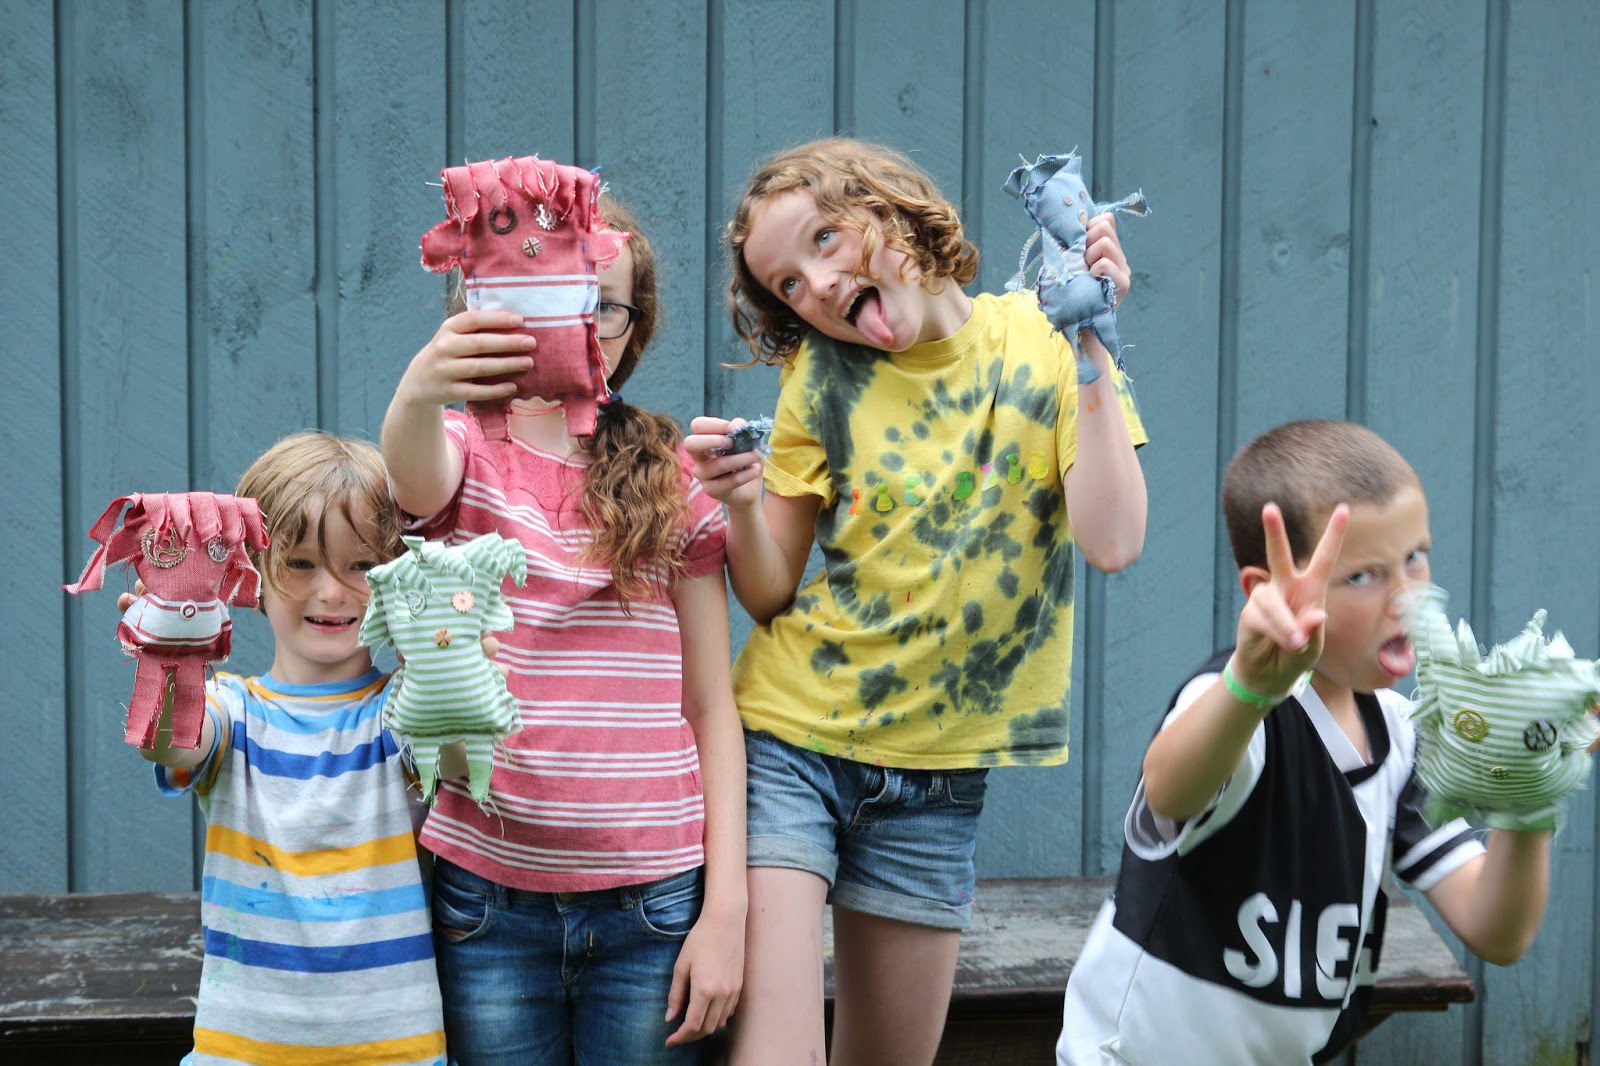
So as you can imagine we were delighted to participate once again in Trixi's Sewing Event for the Summer 2017. This year as veteran sewers the girls were asked to be Ambassadors and to teach someone else to sew during the month of July. They came up with the following project and their first sewing guinea pigs were their bothers - They are hoping to teach their friends how to sew these fun Softies too though!

So here we go, heres a very loved tea towel softie proving you can make something out of pretty much anything. They recycled these tea towels into fun toys for young kids. They left the dangly legs and floppy hair because "We know little kids like twiddling things as they cuddle them".


Big Sister teaching little bro (age 6) the running stitch 


Ella teaching little brother (age 8) how to stop his thread tangling up


Lots of Softie silliness 


HOW TO MAKE YOUR OWN

You will need:

Tea towels
Embroidery Thread
Stuffing
Scissors
Buttons or bits to decorate


Step 1

Fold you tea towel in half, then fold it in half again as shown below.


Each tea towel makes two softies but by folding it this way it helps with the measuring of the softie. Now taking a pen draw a rectangle shape on the quarter of the tea towel facing you, the top of the softy is going to be where the fold is - this is important because when you cut the hair you want the loops to be at the top. Draw on two arms and legs that meet the edges of the fabric.


Once you have drawn the shape you can cut it out. You only need to cut through two layers not four so remember to half open your tea towel up.


Step 2

Once you have cut around your shape you should be left with a shape similar to that pictured below. Note the head still loops over, this helps to keep the fabric lined up as you begin sewing.


To begin sewing the girls used a simple running stitch. Up, down, up, down and so on. We started sewing the head first, do this an inch or two down from the fold you'll see why later when we make the hair.


Once you have gone across the top sew down the side and around the bottom of the shape. No need to sew around the arms or legs for this project - you are just sewing a rectangle. But remember to leave a gap at the end to stuff the filling in!!!


 Step 3

Stuff the body of the softie with the poly filling, no need to make it rock hard they are more fun a little floppy. Once it is stuffed finish sewing up the side and tie off with a knot.


Step 4

At this point we added the details, we hot glued on buttons and cogs to create interesting faces.


We also cut the hair, you do this by making short cuts across where the fabric loops at the head. (Remember when we said to leave a gap at the top of the head this is why.) This creates your softies floppy hair style. 


And you are done!!


 We hope you enjoy your new friend as much as we do! Be sure to tag us on IG @thebluebarn with your pictures if you make one.